Often you will need to test if email is working correctly within your organization. and a great way to do that is through Telnet.
First you will need to know the host name or ip address of the mail server or relay you wish to test.
If you don't know you can use nslookup.
Use Nslookup to determine your mail server.
1. Open an Administrative command prompt.
2. Type "nslookup" press enter.
3. Type "set type=mx" press enter.
4. Type your domain name.
5. It will then return results showing server name and ipaddress.
Now you have the mail server we can make the Telent connection.
1. Open an administrative Command prompt window.
2 Type "telnet YourMailServer 25" press enter.
3. Type "ehlo yourdomain.com" press enter.
4. Type "mail from:youremail@yourdomain.com" press enter.
5. Type "rcpt to:recpient@yourdomain.com" press enter.
6. Type "data" press enter.
7. Type a message(email body) eg. "this is a test" press enter
8. Type "." press enter. This tells the server you are finished with the body of the message and to go ahead and send the email.
9. Type "Quit" to exit the telnet session.
You have now sent a test email message via Telent!
Add user to local Computer group via Comand Line
You can add users to a local security group via the command line with the following command:
netlocalgroup "groupname" "username" /add
and to confirm it worked:
netlocalgroup "groupname"
I wrote a simple little script to run this via powershell with user input.
If you have the psexec tools installed you can run it for a remote machine using the following command
psexec \\RemotePC -u UserName -p password net localgroup "Localgroup" "Username" /add
You can download PsExec tools from here.
netlocalgroup "groupname" "username" /add
and to confirm it worked:
netlocalgroup "groupname"
I wrote a simple little script to run this via powershell with user input.
If you have the psexec tools installed you can run it for a remote machine using the following command
psexec \\RemotePC -u UserName -p password net localgroup "Localgroup" "Username" /add
You can download PsExec tools from here.
Could not flush the DNS Resolver cache: Function Failed During Execution. When flushing DNS cache
To resolve this you need to restart the DNS Client service. You can do this by opening the Services management console by selecting windows button+r and typing services.msc, and then within the console restarting the DNS Client Service or starting it if it's turned off. Ensure the service is running and the startup type is set to automatic after you do so.
You can also achieve the same task through the command prompt by typing:
net stop "dns client" and then
net start "dns client"
Then you are done and will be able to successfully flush the dns cache on the machine.
Compare Active Directory Group Membership with Powershell
Here is a nice little Powershell script I wrote to compare group membership of two active directory users. You can use this script for many different purposes just edit the reference command and property to whatever object you wish to compare.
$UserReference = Get-ADPrincipalGroupmembership (Read-Host "Reference User")
$UserDifference = Get-ADPrincipalGroupmembership (Read-Host "Difference User")
Compare-object $UserReference $UserDifference -property SamAccountName
=> Means the Difference User is a member of a group and the Reference User is not a member.
<= Means the Reference User is a member of the group and the Difference User is not a member.
You can also use the -IncludeEqual parameter to include groups both users are a member of that will be represented by the SideIndicator value of: ==
$UserReference = Get-ADPrincipalGroupmembership (Read-Host "Reference User")
$UserDifference = Get-ADPrincipalGroupmembership (Read-Host "Difference User")
Compare-object $UserReference $UserDifference -property SamAccountName
=> Means the Difference User is a member of a group and the Reference User is not a member.
<= Means the Reference User is a member of the group and the Difference User is not a member.
You can also use the -IncludeEqual parameter to include groups both users are a member of that will be represented by the SideIndicator value of: ==
RE Create Profile in Windows 7
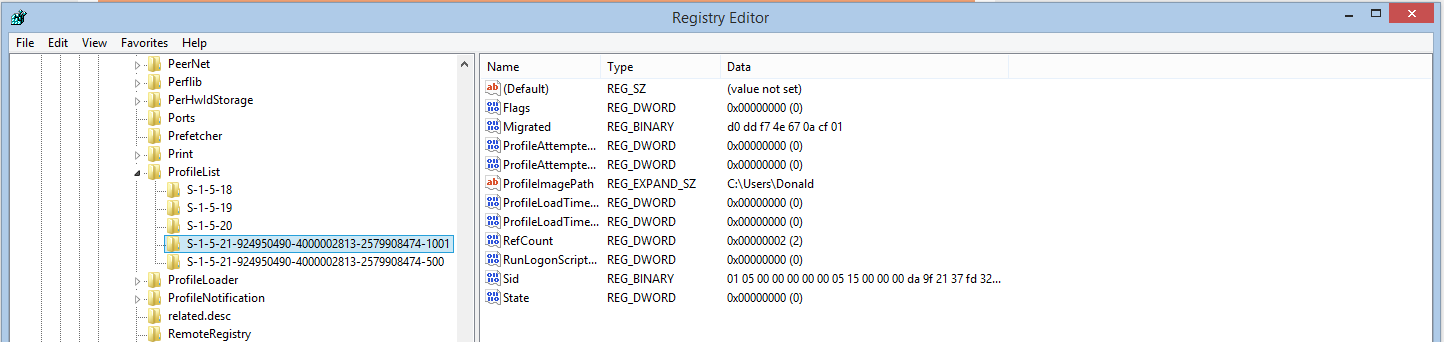
To re create a user profile in windows 7 you must remove the profile from the registry otherwise the user will get a temp profile when they log in next.
To re create the profile you first have to re name the user folder in c:\users so you can retrieve the user data when they login to the new profile
Then you have to delete the profile in Advanced system properties by going to:
control panel>system and security>system
or
Right click computer and select properties
Select the "Advanced system settings" option
In the "User Profiles" field select "Settings"
Then select the profile you would like to remove and select "Delete"
Then open the registry editor by selecting windows button + R and typing regedit and browse to: HKEY_LOCAL_MACHINE\SOFTWARE\Microsoft\Windows NT\CurrentVersion\ProfileList
Select the profile you want to remove right click it and select "delete"
Restart the computer and get the user to log in to create their new profile and copy the users files over form the renamed folder.
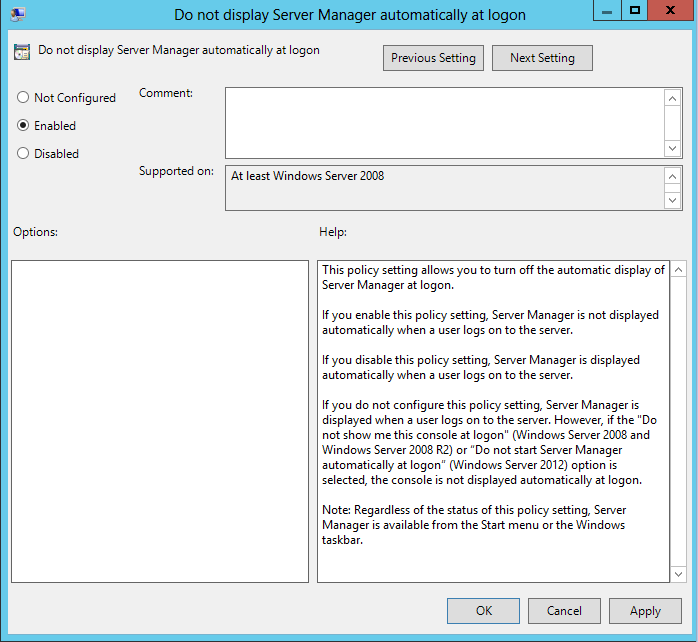
Disable Server Manager on logon with Group Policiy
1. Select "Start," "Administrative Tools"
and "Group Policy Management."
2. Navigate to the "Local Computer Policy/Computer
Configuration/Administrative Templates/System/Server Manager/" sub-folder
in the left pane of the Group Policy Management window.
3.Double-click the "Do Not Display Server Manager
Automatically at Logon" setting in the right pane.
4. Select "Enabled" and then Select "OK."
5. Link the GPO to the appropriate OU that contains your servers and you are done.
Log off user session on remote machine using Powershell
This is a handy little tool you can use with Powershell or in command prompt to see who is logged onto a remote machine and to end there session. Great for servers when you get the "too many users already logged in" message when trying to access a server.
1. You need to get the session ID of a user to log off by running the following command:
2. Enter the following command with the session ID at the end to log the user of:
1. You need to get the session ID of a user to log off by running the following command:
qwinsta /server:servername
2. Enter the following command with the session ID at the end to log the user of:
logoff /server:servername (session id)
I used these commands to put together the following script. It will prompt you for the server name and give you the output of current open sessions then prompt you for the session ID to log off. Enjoy:
$server = read-host "Hostname"
qwinsta /server:$server
$ID = read-host "Session ID to log off"
logoff /server:$server $ID
Subscribe to:
Posts (Atom)