Here is a powershell script that will create a signature in Outlook from a pre-existing template. It takes information from AD andf inserts it into the siganure, and sets the signature as the default signature.
It is quite simple create a signature in out look with all the formating you need to fit in with your company brand. Set placeholders for name, role and numbers we replace these with the AD settings of the logged on user.
The reason I am posting this I have seen a lot of long and over conplicated solutions to do this that doesn't work half the time. This is just simple and works. And if you need to change the way it looks you just change the source siganture, you dont need to re - write 200 lines of HTML.
I have some validation in the copy I deploy to create a slightly different signature for people who are in a certain department or who dont have a mobile number. If you are a fter this send me a message.
#Setting variables
$strName = $env:username
$name = Get-ADUser $strName -properties * | select -ExpandProperty DisplayName
$role = Get-ADUser $strName -properties * | select -ExpandProperty Description
$ipPhone = Get-ADUser $strName -properties * | select -ExpandProperty telephoneNumber
$mobile = Get-ADUser $strName -properties * | select -ExpandProperty MobilePhone
$filepath = location of your signature
#Sets the signature.
#Finds the word "Name" and replaces it with the users name in Active Directory
#Finds the word "Role" and replaces it with the users Job Title in Active Directory
#Finds the word "number" and replaces it with the users IP phone number in Active Directory
#Finds the word "mobile" and replaces it with the users mobile number in Active Directory
#Test Signature
(gc $filepath) -replace "User",$name -replace "\bRole\b",$role -replace "\bnumber\b",$ipPhone -replace "\bmobile\b", "| m: +44 (0) ""+$mobile" > C:\Users\$env:USERNAME\AppData\Roaming\Microsoft\Signatures\test.txt
#Rich text signature
(gc $filepath) -replace "User",$name -replace "\bRole\b",$role -replace "\bnumber\b",$ipPhone -replace "\bmobile\b", "| m: +44 (0) ""+$mobile" > C:\Users\$env:USERNAME\AppData\Roaming\Microsoft\Signatures\test.rtf
#HTML signature
(gc $filepath) -replace "User",$name -replace "\bRole\b",$role -replace "\bnumber\b",$ipPhone -replace "\bmobile\b", $mobile > C:\Users\$env:USERNAME\AppData\Roaming\Microsoft\Signatures\test.htm
#Sets signature named "test" as default signature
$CompanyName="test"
$MSWord = New-Object -com word.application
$EmailOptions = $MSWord.EmailOptions
$EmailSignature = $EmailOptions.EmailSignature
$EmailSignatureEntries = $EmailSignature.EmailSignatureEntries
$EmailSignature.NewMessageSignature=$CompanyName
$EmailSignature.ReplyMessageSignature=$CompanyName
$MSWord.Quit()
Enjoy!!
Showing posts with label Microsoft Windows 7. Show all posts
Showing posts with label Microsoft Windows 7. Show all posts

Add user to local Computer group via Comand Line
You can add users to a local security group via the command line with the following command:
netlocalgroup "groupname" "username" /add
and to confirm it worked:
netlocalgroup "groupname"
I wrote a simple little script to run this via powershell with user input.

If you have the psexec tools installed you can run it for a remote machine using the following command
psexec \\RemotePC -u UserName -p password net localgroup "Localgroup" "Username" /add
You can download PsExec tools from here.
netlocalgroup "groupname" "username" /add
and to confirm it worked:
netlocalgroup "groupname"
I wrote a simple little script to run this via powershell with user input.
If you have the psexec tools installed you can run it for a remote machine using the following command
psexec \\RemotePC -u UserName -p password net localgroup "Localgroup" "Username" /add
You can download PsExec tools from here.
Could not flush the DNS Resolver cache: Function Failed During Execution. When flushing DNS cache

To resolve this you need to restart the DNS Client service. You can do this by opening the Services management console by selecting windows button+r and typing services.msc, and then within the console restarting the DNS Client Service or starting it if it's turned off. Ensure the service is running and the startup type is set to automatic after you do so.


You can also achieve the same task through the command prompt by typing:
net stop "dns client" and then
net start "dns client"

Then you are done and will be able to successfully flush the dns cache on the machine.

RE Create Profile in Windows 7
To re create a user profile in windows 7 you must remove the profile from the registry otherwise the user will get a temp profile when they log in next.
To re create the profile you first have to re name the user folder in c:\users so you can retrieve the user data when they login to the new profile
Then you have to delete the profile in Advanced system properties by going to:
control panel>system and security>system
or
Right click computer and select properties
Select the "Advanced system settings" option
In the "User Profiles" field select "Settings"
Then select the profile you would like to remove and select "Delete"

Then open the registry editor by selecting windows button + R and typing regedit and browse to: HKEY_LOCAL_MACHINE\SOFTWARE\Microsoft\Windows NT\CurrentVersion\ProfileList
Select the profile you want to remove right click it and select "delete"
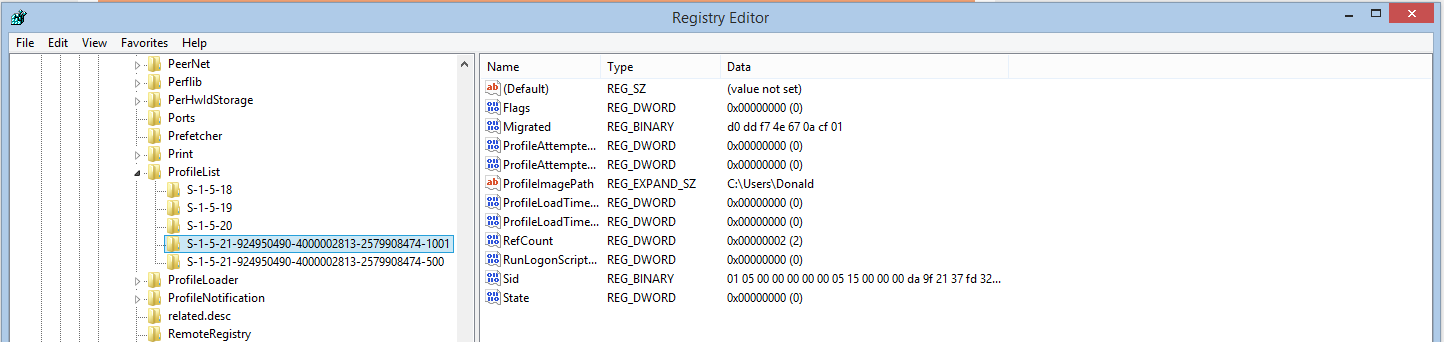
Restart the computer and get the user to log in to create their new profile and copy the users files over form the renamed folder.
Log off user session on remote machine using Powershell
This is a handy little tool you can use with Powershell or in command prompt to see who is logged onto a remote machine and to end there session. Great for servers when you get the "too many users already logged in" message when trying to access a server.
1. You need to get the session ID of a user to log off by running the following command:

2. Enter the following command with the session ID at the end to log the user of:
1. You need to get the session ID of a user to log off by running the following command:
qwinsta /server:servername
2. Enter the following command with the session ID at the end to log the user of:
logoff /server:servername (session id)
I used these commands to put together the following script. It will prompt you for the server name and give you the output of current open sessions then prompt you for the session ID to log off. Enjoy:
$server = read-host "Hostname"
qwinsta /server:$server
$ID = read-host "Session ID to log off"
logoff /server:$server $ID
Format Hard Disk or USB Removable Storage using Diskpart
Format Hard Disks or USB removable storage using the
diskpart command line utility.
Open command prompt
Diskpart – To initiate the diskpart utility
List disk – To list all available disks.
Select disk – Select the disk you wish to format.

Detail disk – Find out more details about the selected disk. Handy to make sure you are formatting the right disk.

Clean all – Formats the disk
Create partition primary – Creates a partition on the disk.
If you don’t specify the size all available space will be used by default.
Select partition 1 - Select desired partition
Active – Sets the selected partition as active.
Format fs=(enter desired filesystem ntfs, fat32 ect.) –
formats the volume with the requires file system

Assign – to give the drive the next available drive letter
or you can specify one by typing
Assign letter=(desired letter)


Exit – to exit diskpart
View Applied Group Policy for Logged on User
To troubleshoot issues relating to group policy run one of the following commands.
To generate a report in html format type into Command Prompt or Powershell:
Gpresult /h c:\test.html(or whatever local or network location you desire)
Then browse to the location and open the report in a web browser.

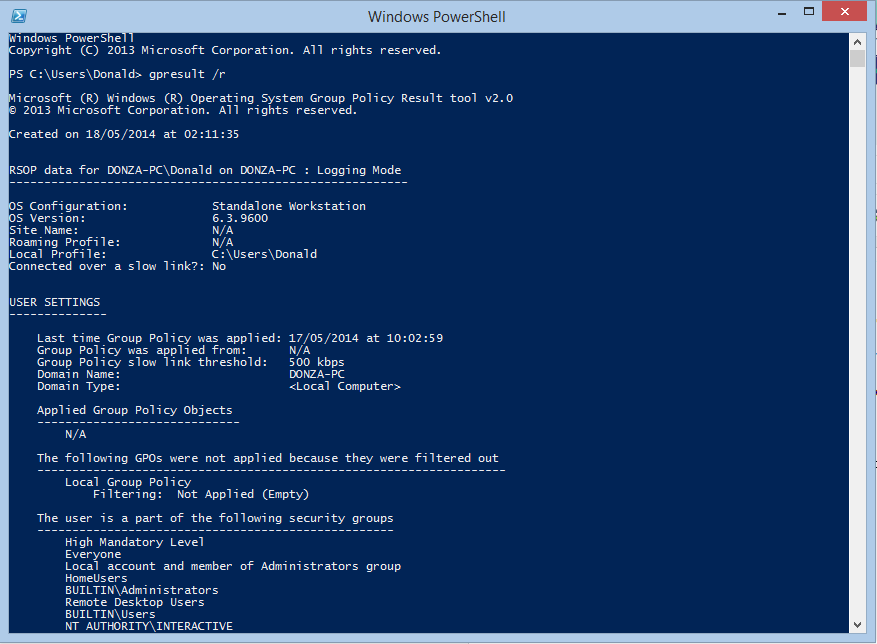
To view the results within Command Prompt or Powershell simply type:
gpresult /r
Remove Driver Package from Driver Store
Handy little command line tool to permanently delete drivers from the driver store in Windows.
1. Open a administrative command prompt
2. to view drivers in driver store type:
pnputil.exe -e

3. Find the driver you want to remove and insert the "Published Name" into the command
1. Open a administrative command prompt
2. to view drivers in driver store type:
pnputil.exe -e
3. Find the driver you want to remove and insert the "Published Name" into the command
pnputil.exe -d oem$.inf
$=number of the drivers Published Name.
4. Done.
Adding Driver package to Windows installation
You can add your own driver package to a bootable windows installation using dism. It can save a lot of time and heartache post installation.
1. First I like to move the install.wim file to an accessable location. On the windows installation media open the sources folder and copy the install.wim file to your root directory.
2. Then create a folder in your root directory in this case I like to use "mount"
3. Open an administrative command prompt
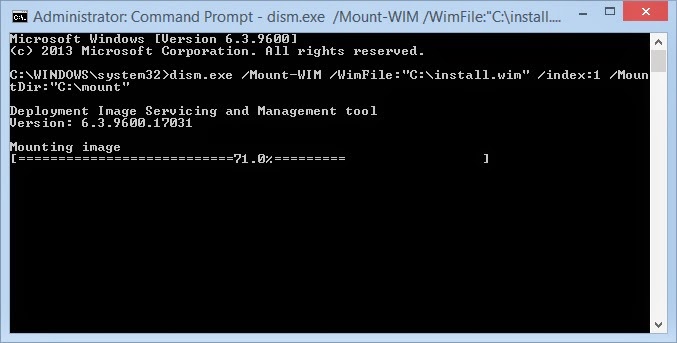
3. To mount the wim file type:
dism.exe /Mount-WIM /WimFile:"C:\install.wim" /index:1 /MountDir:"C:\mount"
4. To inject the drivers into the wim type:
dism /image:C:\mount /Add-Driver /driver:"C:\Driver location" /recurse
(ensure all drivers are located in the same location and the packages have been unzipped to expose the files)
dism /image:C:\mount /Add-Driver /driver:"C:\Driver location" /recurse
(ensure all drivers are located in the same location and the packages have been unzipped to expose the files)
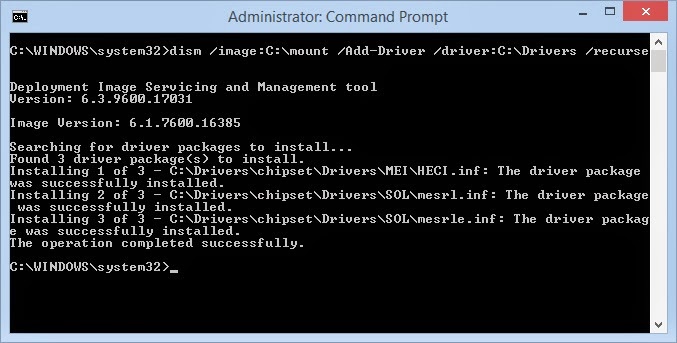
5. To unmount and commit the changes type:
dism /unmount-wim /Mountdir:C:\mount /commit

6. Copy the wim file back into sources folder on the windows installation media.
7. Done! Never worry about about drivers again.
Subscribe to:
Posts (Atom)